Every WordPress owner knows the small jolt of fear that comes with clicking “update” on a live site. A plugin update, a theme change, a new piece of code — any of them can break something, and when the site is live, that break happens in front of your visitors, costing you traffic, trust, and sometimes sales while you scramble to fix it. Most people deal with this by either avoiding updates entirely, which is its own risk, or by making changes and hoping for the best. There is a far better way, and it is what professionals use: a staging site.
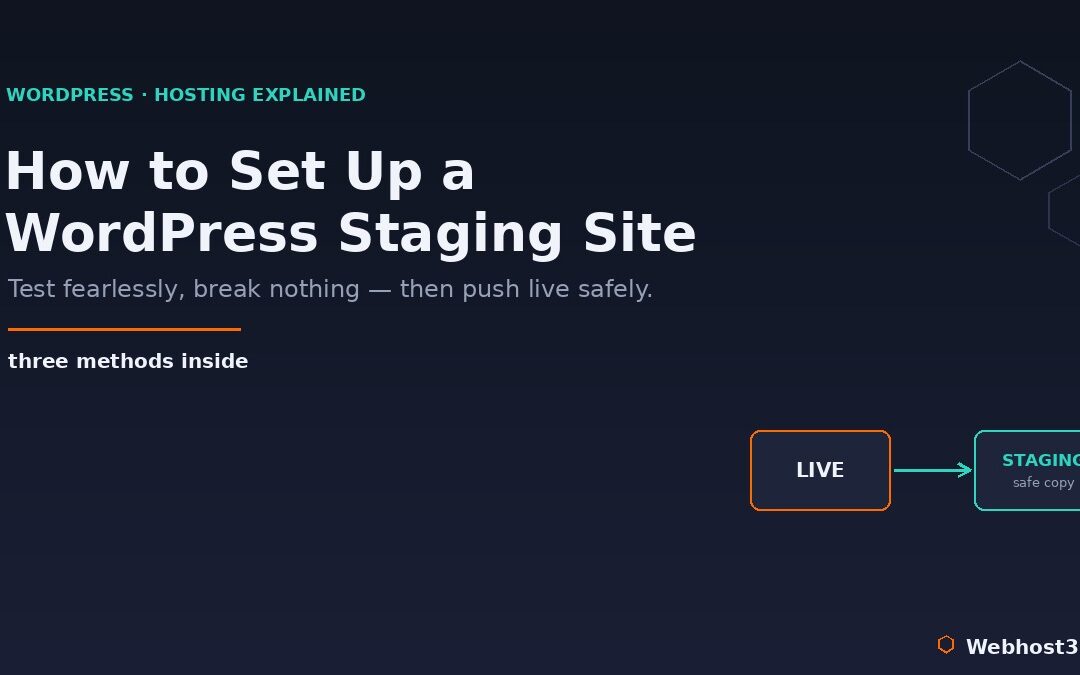
A WordPress staging site lets you test every change safely on a private copy first, so nothing ever breaks in public. This guide covers what staging is, three ways to set one up — from a one-click button to a fully manual process — and, most importantly, how to push your tested changes back to the live site without losing data, which is the step that catches people out. By the end you will be able to update, redesign, and experiment with complete confidence.
What Is a WordPress Staging Site, and Why You Need One
A staging site is a private, identical copy of your live website that lives in a separate location, where you can make and test changes without any of them affecting the real site your visitors see. Think of it as a rehearsal space. You can update WordPress core, try a new plugin, redesign a page, or change your theme on the staging copy, click around to confirm everything works, and only then apply those changes to the live site. Until you choose to push them, the live site carries on exactly as it was.
The reason this matters comes down to risk. On a live site, a single incompatible plugin update or a theme change that conflicts with your setup can produce the dreaded white screen, break your layout, or take the site down entirely — and it does so while real visitors are trying to use it. Staging removes that risk completely. Whatever breaks, breaks in private, where the only person who sees it is you, and where fixing it costs nothing but a little time.
Everyone with a WordPress site benefits from staging, but some need it more than others. If you run an online store, a business site, or anything where downtime directly costs money or credibility, testing on staging is not a nice-to-have — it is basic operational hygiene. The busier and more important your site, the less you can afford to experiment on it directly, and the more a staging site earns its place in your workflow.
Before You Start: One Rule
There is a single rule that applies to everything that follows, and it is worth stating on its own because skipping it is how people turn a routine task into a disaster: always back up your live site first. Back it up before you create a staging copy, and back it up again immediately before you push any changes live. A current backup is your guarantee that no matter what goes wrong — a botched push, an unexpected conflict, a mistake — you can restore the site to exactly how it was. Our guide on website backup strategies covers doing this properly, and during staging work it is not optional. With that rule established, here are the three ways to set up a staging site.
Method 1: The Easy Way — One-Click Staging in Your Control Panel
For most people, this is the method to use. If your hosting includes one-click staging through Softaculous — the app installer built into the DirectAdmin control panel — you can create a full staging copy in a couple of clicks, with no technical skill and no server access required.
Create the staging copy
Log in to your control panel and open Softaculous, then go to WordPress and find your site under the list of current installations. Click the Create Staging button next to it. Softaculous will ask you to confirm a few details and, by default, creates the staging copy at a subdomain like staging.yourdomain.com. It then clones your files and database into that location automatically. When it finishes, you have a complete, working copy of your site at the staging URL, completely separate from your live site.
Test everything on staging
Log in to the staging site using its own admin URL — the same WordPress credentials as your live site — and this is where you do the actual work. Apply your WordPress and plugin updates here, install and configure that new plugin, change the theme, redesign the page, whatever you came to do. Then test it properly: click through your key pages, submit a contact form, run a test order through checkout if you have a store, and view it on mobile. The whole point is that anything that breaks, breaks here, where it is harmless and you can fix it at your own pace while your live site carries on serving visitors normally. This is the same discipline behind a safe site migration — you confirm everything works on the new copy before you flip the switch.
Push to live
Once you are happy that everything works on staging, the Push to Live button copies your tested changes back to the production site. Softaculous handles the file and database transfer for you, and when it is done your live site reflects the changes you made and verified on staging.
That last step sounds simple, and for a basic site it is. But it carries a risk that almost every staging tutorial glosses over, and getting it wrong can quietly destroy data. So before you click that button, read the next section — it is the most important part of this guide.
The Critical Warning: Don’t Overwrite Your Live Data
Here is what the quick tutorials do not tell you. A default “Push to Live” performs a full push — it overwrites your live site’s database with the copy from staging. For a simple brochure site that never changes on its own, that is fine. But for any site that collects data, it is a trap.
Think about the timeline. You create your staging copy on Monday. You spend three days carefully testing changes on it. Meanwhile, your live site keeps running — and over those three days it collects new orders, new comments, new form submissions, new user registrations. When you push staging to live on Thursday with a full database push, staging’s three-day-old database replaces the live one, and every order, comment, and signup that arrived during those three days is wiped out. The staging copy never knew about them, so the push erases them.
This is the single most important thing to get right, and the rules are straightforward. First, if your live site collects any data — a store, a membership site, anything with comments or forms — do not push the database. Push files only, so your code, theme, and plugin changes go live while the live database, with all its fresh data, stays untouched; then apply any genuine database changes deliberately and carefully. Better still, use a merge-based staging tool that pushes only the specific changes you made rather than overwriting everything.
Second, always take a fresh backup of your live site in the moments before you push, so that even if something goes wrong you can restore instantly. Third, push during your quietest traffic hours to minimise the window in which new data could arrive. Respect those three rules and the push step becomes as safe as it should be; ignore them and a routine update can cost you a week of real business data.
Method 2: The Plugin Way
What if your host does not offer one-click staging? Then a plugin is your next best option. A staging plugin clones your site from inside the WordPress dashboard, so you do not need any control-panel features to make it work.

WP Staging is the most popular choice. You install it like any plugin, and it creates a staging copy of your site in a subdirectory. The free version handles the cloning part well, and it is genuinely useful for testing. However, there is one limit you should know about up front. The free version does not push changes back to live. For that, you need WP Staging Pro, or you apply your tested changes to the live site manually afterward. The official WordPress plugin directory lists WP Staging and its alternatives if you want to compare them.
Duplicator is another solid option. It is built for cloning and migrating sites, and many people use it to create and move staging copies by hand. The steps are similar across these tools. First, install and activate the plugin. Next, create a staging clone and wait for it to finish. Then test your changes on the clone. Finally, push them with the Pro version, or apply them to live manually if you are on the free tier. Plugins give you staging on almost any host, which is exactly why they are so handy.
Method 3: The Manual Way
If you are comfortable with the technical side, the manual method gives you complete control. It takes more steps, but nothing is hidden from you, and it works on any hosting account.
Start with the files. Copy your entire WordPress directory into a subdomain or subdirectory, using either the File Manager in your control panel or rsync over SSH. Next comes the database. Export your live database through phpMyAdmin, then create a fresh database and import the copy into it. After that, edit the wp-config.php file in your staging folder so it points to the new database with the correct credentials.
One more step matters here. Update the siteurl and home values in the staging database so they match the staging URL, not the live one. Otherwise the staging site tries to load your live site instead. Then test everything thoroughly on the staging copy. When you are ready to deploy, you reverse the process carefully, and the same database-overwrite warning from earlier applies in full. This method shares its core mechanics with a full site migration, so the same care pays off.
Keep Your Staging Site Private
One detail is easy to forget, and it can hurt your SEO. You do not want Google to index your staging site. If it does, you end up with a duplicate copy of your whole site in search results, which confuses search engines and splits your ranking signals.
Two quick steps prevent this. First, password-protect the staging directory, either through your control panel or with a simple .htaccess rule, so only you can reach it. Second, on the staging install, go to Settings, then Reading, and tick “Discourage search engines from indexing this site.” Together these keep your rehearsal space private, exactly as it should be. Do both as soon as the staging copy exists, before anything has a chance to get crawled.
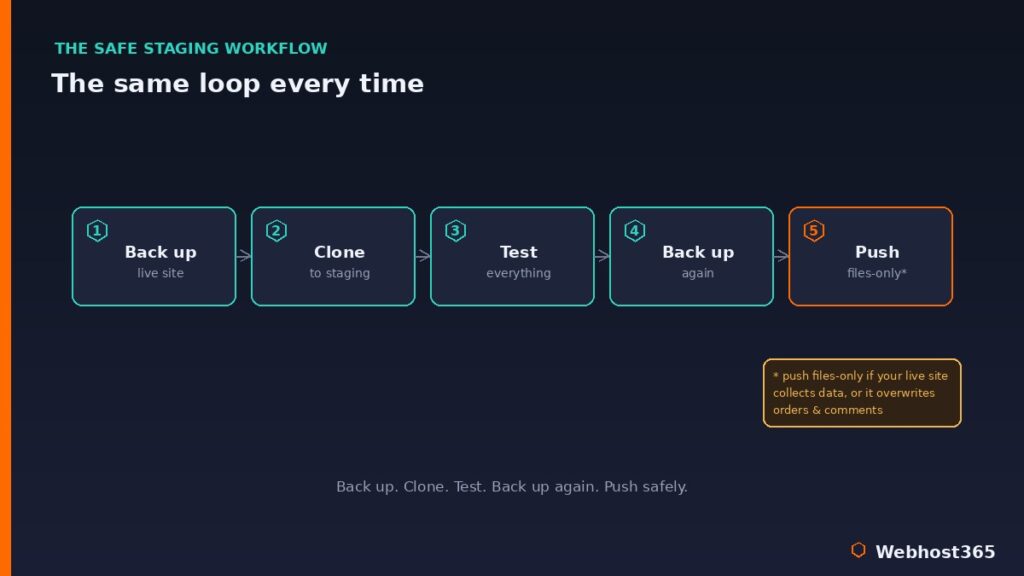
A Sensible Staging Workflow
Once you have a method in place, the habit matters more than the tool. A good staging workflow is the same few steps every time, and following them turns risky edits into routine ones.
Start by backing up your live site. Then create your staging copy, or refresh an existing one so it matches live. Next, make your changes on staging and test them thoroughly — check your key pages, your forms, your checkout if you run a store, and how everything looks on mobile. When you are satisfied, back up your live site once more, right before you deploy. Finally, push your changes, using a files-only push if your live site collects data, and verify the live site afterward. Run that loop every time and your site stays safe no matter how ambitious your changes are.
The beauty of this routine is that it scales with your confidence. Small tweaks take minutes; a full redesign follows the same safe path, just with more testing in the middle. Either way, nothing reaches your visitors until you have seen it work.
Conclusion: Test Fearlessly, Break Nothing
A staging site changes how you run a WordPress site. Instead of dreading updates and avoiding changes, you test everything in private, fix problems where no one can see them, and push only what you know works. The fear of breaking your live site simply disappears. Whether you use a one-click tool, a plugin, or the manual method, the principle is the same — and the one step to get right is never overwriting your live data when you push.
Good hosting makes this easier from the start. Webhost365 WordPress hosting runs Softaculous for simple WordPress management, and every plan includes free automated backups, NVMe storage, LiteSpeed caching, and free SSL — so creating a test copy, rolling back safely, and deploying with confidence are all built in rather than bolted on. WordPress hosting starts at $2.49 a month, and your renewal price always matches your signup price. Set up a staging site once, build the workflow into your routine, and you will never fear an update again.
FAQ: WordPress Staging Sites
A staging site is a private, identical copy of your live WordPress site used for testing. You make changes there — updates, new plugins, redesigns — and confirm they work before applying them to the live site. Until you push those changes, your live site stays exactly as it was, so visitors never see anything broken.
It can, and this is the most important thing to watch. A default full push replaces your live database with the staging copy, which wipes any orders, comments, or form submissions that arrived while you worked on staging. To avoid this, push files only when your live site collects data, use a merge-based tool, and always back up immediately before you push.
Often, yes. Many hosts include one-click staging at no extra cost, and free plugins like WP Staging create a staging copy for nothing. The catch is that some free tools clone your site but do not push changes back to live, which is a paid feature — so you either upgrade or apply your tested changes to live manually.
Use your host’s one-click staging tool if it has one, through Softaculous in the control panel. If you prefer full control, do it manually: copy your files to a subdomain, export and import the database through phpMyAdmin, update wp-config.php and the site URL, and test the copy. Both routes avoid installing any plugin.
It can, unless you prevent it, and a duplicate of your site in search results hurts your SEO. Stop it with two steps: password-protect the staging directory so it is not publicly reachable, and tick “Discourage search engines from indexing this site” under Settings, then Reading, on the staging install. Do both as soon as you create the copy.
They solve different problems, so you want both. A backup fixes your site after something breaks, which still means downtime your visitors see. A staging site stops the breakage from ever reaching your live site in the first place. Backups are your safety net; staging is the floor that keeps you from falling. Use them together.