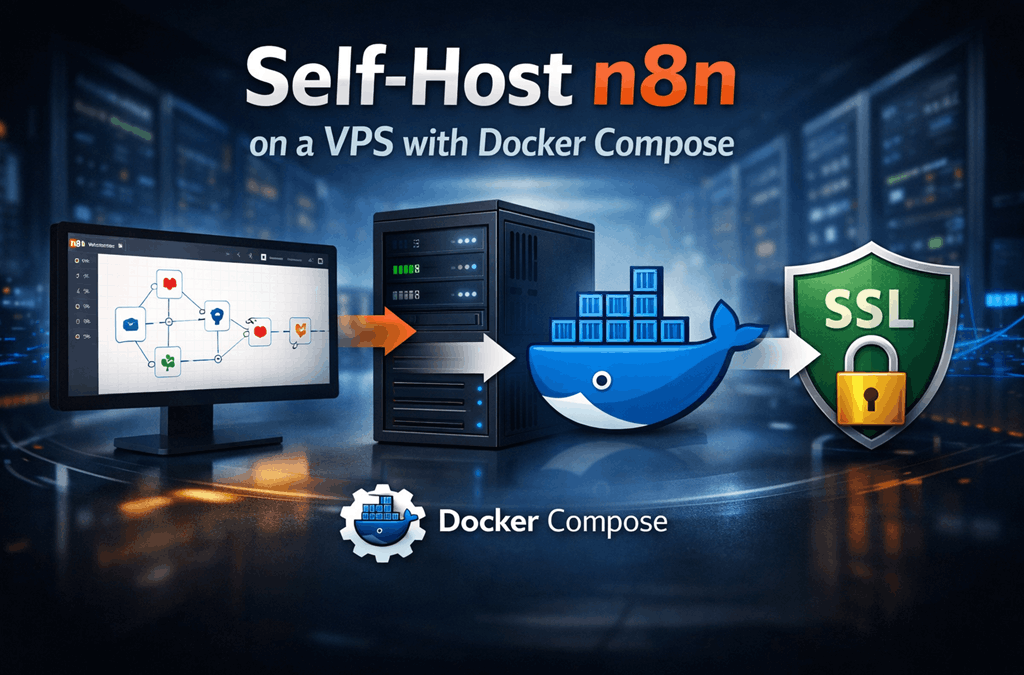
What You Will Build
By the end of this tutorial, you will have:
- A working self-hosted n8n instance
- n8n running inside Docker Compose
- A domain or subdomain pointed to your VPS
- HTTPS/SSL enabled
- A setup that is ready for real workflows, webhooks, and production use
This setup is ideal for:
- Marketing automation
- Lead capture workflows
- CRM sync jobs
- AI agent pipelines
- Internal team automation
- Client automation projects
- API and webhook processing
Who Should Self-Host n8n
Self-hosting n8n is a good fit if you want:
- Full control over your workflow data
- Freedom to customize your environment
- Lower long-term cost than some hosted automation platforms
- Better privacy for internal or client workflows
- The ability to connect n8n with custom apps, private APIs, or local services
Self-hosting is especially useful for:
- Developers
- Agencies
- SaaS founders
- Technical marketers
- Internal operations teams
- AI workflow builders
If you want the easiest path with less server management, a managed n8n hosting plan may be better. But if you want flexibility and control, a VPS setup is a strong option.
What You Need Before You Start
Before installing n8n, make sure you have the following:
- A Linux VPS
- Root or sudo access
- A domain or subdomain such as
n8n.yourdomain.com - Basic command-line access via SSH
- Docker and Docker Compose support
- Port access for web traffic
A fresh Ubuntu server is commonly used for this type of setup because it is simple to manage and widely supported.
Recommended VPS Requirements
Your exact server size depends on how heavily you plan to use n8n.
Minimum for testing or light personal use
- 1 vCPU
- 2 GB RAM
- 20 GB SSD storage
Recommended for small business or production use
- 2 vCPU
- 4 GB RAM
- 40 GB+ SSD or NVMe storage
Recommended for heavier workflows, more users, or webhook traffic
- 4+ vCPU
- 8 GB+ RAM
- Fast SSD or NVMe storage
- PostgreSQL database
- Reverse proxy and SSL
- Backup system enabled
For production use, using a domain, SSL, backups, and a proper database is strongly recommended.
Step 1: Prepare Your VPS
Start by connecting to your VPS over SSH.
ssh root@your-server-ipIf you are using a non-root user with sudo access, connect with that user instead.
Before installing anything, update the server packages.
apt update && apt upgrade -yInstall a few basic tools that are commonly useful during setup.
apt install -y curl wget git ufw nano ca-certificates gnupg lsb-releaseSet your server hostname if needed.
hostnamectl set-hostname n8n-serverIt is also a good idea to configure your firewall early.
Allow SSH first so you do not lock yourself out.
ufw allow OpenSSH
ufw allow 80
ufw allow 443
ufw enable
Check the firewall status:
ufw statusStep 2: Install Docker and Docker Compose
Remove any old Docker packages if they exist.
apt remove -y docker docker-engine docker.io containerd runcAdd Docker’s official GPG key and repository.
install -m 0755 -d /etc/apt/keyrings
curl -fsSL https://download.docker.com/linux/ubuntu/gpg | gpg --dearmor -o /etc/apt/keyrings/docker.gpg
chmod a+r /etc/apt/keyrings/docker.gpg
echo \
"deb [arch=$(dpkg --print-architecture) signed-by=/etc/apt/keyrings/docker.gpg] https://download.docker.com/linux/ubuntu \
$(. /etc/os-release && echo "$VERSION_CODENAME") stable" | \
tee /etc/apt/sources.list.d/docker.list > /dev/nullUpdate package lists again and install Docker.
apt update
apt install -y docker-ce docker-ce-cli containerd.io docker-buildx-plugin docker-compose-plugin
Check that Docker is working:
docker --version
docker compose version
systemctl enable docker
systemctl start docker
Test Docker with:
docker run hello-worldIf the test works, Docker is ready.
Step 3: Create Your n8n Project Folder
Create a dedicated directory for your n8n deployment.
mkdir -p /opt/n8n
cd /opt/n8n
Inside this folder, you will keep:
- your
docker-compose.yml - your
.envfile - persistent n8n data
- optional database configuration later
Create a local data directory for n8n.
mkdir -p /opt/n8n/n8n_dataIf you plan to use PostgreSQL later, you can also prepare a database volume directory now.
mkdir -p /opt/n8n/postgres_dataYour folder structure will look like this:
/opt/n8n
├── docker-compose.yml
├── .env
├── n8n_data
└── postgres_data
Step 4: Create the Docker Compose File
Now create your Docker Compose file.
nano /opt/n8n/docker-compose.ymlPaste the following configuration:
services:
  n8n:
    image: n8nio/n8n:latest
    container_name: n8n
    restart: unless-stopped
    ports:
      - "5678:5678"
    env_file:
      - .env
    volumes:
      - ./n8n_data:/home/node/.n8n
Save and exit.
This is a simple and clean starter setup. It will:
- pull the latest n8n image
- restart automatically if the server reboots
- expose n8n on port
5678 - load environment variables from
.env - store your workflows and settings in
./n8n_data
If you want a more production-ready setup from the beginning, use this version with PostgreSQL included.
services:
  postgres:
    image: postgres:16
    container_name: n8n_postgres
    restart: unless-stopped
    environment:
      POSTGRES_USER: n8n
      POSTGRES_PASSWORD: strongpasswordhere
      POSTGRES_DB: n8n
    volumes:
      - ./postgres_data:/var/lib/postgresql/data

  n8n:
    image: n8nio/n8n:latest
    container_name: n8n
    restart: unless-stopped
    ports:
      - "5678:5678"
    env_file:
      - .env
    depends_on:
      - postgres
    volumes:
      - ./n8n_data:/home/node/.n8n
If you are just testing n8n, the first setup is enough. you expect more workflows, more executions, or business use, the PostgreSQL setup is the better choice.
Step 5: Create the Environment File
Now create your .env file.
nano /opt/n8n/.envIf you are using the simple setup without PostgreSQL, paste this:
N8N_HOST=n8n.yourdomain.com
N8N_PORT=5678
N8N_PROTOCOL=https
WEBHOOK_URL=https://n8n.yourdomain.com/
GENERIC_TIMEZONE=UTCN8N_SECURE_COOKIE=true
NODE_ENV=productionN8N_RUNNERS_ENABLED=true
If you are using PostgreSQL, use this version instead:
N8N_HOST=n8n.yourdomain.com
N8N_PORT=5678
N8N_PROTOCOL=https
WEBHOOK_URL=https://n8n.yourdomain.com/
GENERIC_TIMEZONE=UTCN8N_SECURE_COOKIE=true
NODE_ENV=productionDB_TYPE=postgresdb
DB_POSTGRESDB_HOST=postgres
DB_POSTGRESDB_PORT=5432
DB_POSTGRESDB_DATABASE=n8n
DB_POSTGRESDB_USER=n8n
DB_POSTGRESDB_PASSWORD=strongpasswordhereN8N_RUNNERS_ENABLED=true
Replace these values before saving:
n8n.yourdomain.comwith your real domain or subdomainUTCwith your preferred timezone if neededstrongpasswordherewith a strong database password
Example timezone values:
GENERIC_TIMEZONE=Asia/KolkataGENERIC_TIMEZONE=America/New_YorkGENERIC_TIMEZONE=Europe/LondonStep 6: Start n8n with Docker Compose
Go to your project folder:
cd /opt/n8nStart the containers in the background:
docker compose up -dCheck whether the containers are running:
docker psView the logs if needed:
docker compose logs -fIf everything starts correctly, n8n will now be listening on port 5678.
You can test it by opening this in your browser:
http://your-server-ip:5678If the installation is working, you should see the n8n setup page.
To stop the containers later:
docker compose downTo restart them:
docker compose up -dStep 7: Connect Your Domain to n8n
For production use, you should access n8n with a proper domain or subdomain instead of using the raw server IP.
A common setup is:
n8n.yourdomain.comGo to your DNS provider and create an A record pointing your subdomain to your VPS IP address.
Example:
Type: A
Name: n8n
Value: your-server-ip
TTL: Auto
After adding the DNS record, wait for propagation.
You can verify that your domain points to the server with:
ping n8n.yourdomain.comOr:
dig n8n.yourdomain.comOnce the domain resolves correctly, you are ready to place a reverse proxy in front of n8n and enable SSL.
Step 8: Secure n8n with SSL
The easiest production setup is to place Nginx in front of n8n and then issue a free SSL certificate with Certbot.
Install Nginx and Certbot:
apt install -y nginx certbot python3-certbot-nginxCreate a new Nginx site config:
nano /etc/nginx/sites-available/n8nPaste this configuration:
server {
    listen 80;
    server_name n8n.yourdomain.com;    location / {
        proxy_pass http://127.0.0.1:5678;
        proxy_http_version 1.1;
        proxy_set_header Connection '';
        proxy_set_header Host $host;
        proxy_set_header X-Real-IP $remote_addr;
        proxy_set_header X-Forwarded-For $proxy_add_x_forwarded_for;
        proxy_set_header X-Forwarded-Proto $scheme;
        proxy_buffering off;
        chunked_transfer_encoding off;
        proxy_read_timeout 3600;
        proxy_send_timeout 3600;
    }
}
Enable the site:
ln -s /etc/nginx/sites-available/n8n /etc/nginx/sites-enabled/n8nTest the Nginx configuration:
nginx -tReload Nginx:
systemctl reload nginxNow issue the SSL certificate:
certbot --nginx -d n8n.yourdomain.comAfter the certificate is installed, open your n8n URL in the browser:
https://n8n.yourdomain.comYour n8n instance should now be running over HTTPS.
Step 9: Add Basic Security Hardening
Self-hosting n8n is simple, but production use needs some basic security steps.
First, make sure your firewall only allows the required ports:
ufw allow OpenSSH
ufw allow 80
ufw allow 443
ufw status
If you do not need direct public access to port 5678, keep it internal only and access n8n through Nginx.
If you previously exposed it publicly, remove that rule.
ufw delete allow 5678You should also keep your server updated regularly:
apt update && apt upgrade -yTo restart Docker and Nginx after updates if needed:
systemctl restart docker
systemctl restart nginx
Make sure your .env file is not publicly accessible and remains only on the server.
You should also back up your n8n data folder regularly:
tar -czf /root/n8n-backup-$(date +%F).tar.gz /opt/n8nA simple daily backup cron job can be added like this:
crontab -eThen add:
0 3 * * * tar -czf /root/n8n-backup-$(date +\%F).tar.gz /opt/n8nFor production environments, it is also a good idea to:
- use strong passwords
- use PostgreSQL instead of SQLite for heavier usage
- monitor disk space and memory
- update n8n in a controlled way
- keep SSL active and renewed
- secure server access with SSH keys
PostgreSQL vs SQLite for n8n
When you self-host n8n, one of the most common questions is whether you should use SQLite or PostgreSQL.
The short answer is simple:
- SQLite is fine for testing, learning, and very small personal workflows.
- PostgreSQL is better for production, business use, team use, and larger workflow execution volumes.
When SQLite is okay
SQLite can work well if you are:
- just testing n8n
- building a personal automation lab
- running a few lightweight workflows
- not expecting heavy webhook traffic
- using n8n alone without multiple users or larger execution history
SQLite is simple because it does not require a separate database container or external database server. It stores data locally and is easier for beginners.
When PostgreSQL is the better choice
PostgreSQL is the better option if you are:
- running n8n for a business
- using many workflows
- processing webhook traffic regularly
- storing more execution history
- planning for long-term growth
- running client automations
- using n8n in production
PostgreSQL is more stable for larger workloads and is the recommended direction for more serious use.
Quick comparison
| Feature | SQLite | PostgreSQL |
|---|---|---|
| Easy setup | Yes | Moderate |
| Best for testing | Yes | Yes |
| Best for production | No | Yes |
| Better scaling | No | Yes |
| Better for large workflow history | No | Yes |
| Separate database service needed | No | Yes |
If you started with SQLite
You can begin with SQLite while testing, then move to PostgreSQL later when your usage grows.
If you are building something important from day one, it is better to start with PostgreSQL and avoid migration later.
How to Update n8n Safely
Keeping n8n updated is important for stability, features, and security. But updates should be done carefully, especially on production systems.
Before updating, always create a backup.
Step 1: Go to your n8n directory
cd /opt/n8nStep 2: Create a backup
tar -czf /root/n8n-backup-before-update-$(date +%F).tar.gz /opt/n8nIf you are using PostgreSQL, it is also a good idea to back up the database separately.
Example PostgreSQL backup command:
docker exec n8n_postgres pg_dump -U n8n n8n > /root/n8n-postgres-backup-$(date +%F).sqlStep 3: Pull the latest image
docker compose pull4: Restart with the new image
docker compose up -dStep 5: Check container status
docker psStep 6: Check logs after update
docker compose logs -fIf everything looks good, your update is complete.
Safer update method for production
Instead of blindly using the latest image forever, you can pin a specific n8n version inside docker-compose.yml.
For example:
image: n8nio/n8n:1.89.2This gives you more control over updates and helps avoid surprise changes after a new release.
When you want to upgrade, edit the version manually, then run:
docker compose pull
docker compose up -d
Good update habits
- always back up before updating
- do not update during peak usage
- check logs after every update
- pin a version for production stability
- test major changes before using them in critical workflows
Common n8n Self-Hosting Errors and Fixes
Even a clean setup can run into issues. Here are the most common ones and how to fix them.
n8n does not open in the browser
Check whether the container is running:
docker psIf it is not running, inspect logs:
docker compose logs -fCommon causes include:
- wrong
.envvalues - container crash during startup
- port conflict
- Docker not running
Domain works but SSL does not
Make sure the domain points to the correct server IP:
dig n8n.yourdomain.comThen check Nginx config:
nginx -t
systemctl reload nginx
Retry Certbot after DNS is confirmed.
certbot --nginx -d n8n.yourdomain.comWebhooks are not firing correctly
This usually happens when WEBHOOK_URL is wrong or when reverse proxy headers are not set correctly.
Check your .env file and make sure it includes the correct public URL:
WEBHOOK_URL=https://n8n.yourdomain.com/Then restart n8n:
docker compose up -dn8n keeps restarting
Check logs first:
docker compose logs -fPossible causes:
- invalid database credentials
- broken environment variables
- permission problems in the data directory
- not enough memory on the VPS
Check system memory:
free -hCheck disk space:
df -hPermission issues with persistent data
If n8n cannot write to the data folder, fix directory permissions.
chown -R 1000:1000 /opt/n8n/n8n_dataIf using PostgreSQL data too:
chown -R 999:999 /opt/n8n/postgres_dataNginx gives 502 Bad Gateway
This usually means Nginx cannot connect to n8n on port 5678.
Check if n8n is running:
docker psCheck if port 5678 is listening:
ss -tulpn | grep 5678If n8n is stopped, restart it:
docker compose up -dChanges in .env are not applying
After changing environment variables, restart the containers:
docker compose down
docker compose up -d
Server becomes slow after adding more workflows
This can happen if your VPS is too small.
Check resource usage:
free -h
df -h
uptime
At that point, consider:
- moving from SQLite to PostgreSQL
- upgrading RAM or CPU
- reducing execution history retention
- optimizing heavy workflows
- using a better VPS plan
Self-Hosted n8n vs Managed n8n Hosting
Choosing between self-hosted n8n and managed n8n hosting depends on your goals, technical skills, budget, and how much time you want to spend managing infrastructure.
If you enjoy working with servers, Docker, domains, backups, SSL, and updates, self-hosting gives you maximum flexibility. But if you want to focus only on building workflows and automations, managed hosting is often the simpler path.
Self-hosted n8n
Self-hosting is a strong choice if you want:
- full control over your server and data
- custom server-level configuration
- flexibility for private APIs and internal apps
- lower long-term costs at scale
- the ability to tune performance your own way
Self-hosted n8n works well for:
- developers
- agencies
- technical founders
- internal automation teams
- users who already manage VPS servers
Managed n8n hosting
is a better fit if you want:
- faster setup
- less DevOps work
- automatic maintenance
- less time spent on server troubleshooting
- a simpler path for production use
Managed hosting works well for:
- non-technical users
- small business owners
- teams that want to launch quickly
- agencies that do not want to manage infrastructure
- users who care more about workflows than server administration
Quick comparison table
| Feature | Self-Hosted n8n | Managed n8n Hosting |
|---|---|---|
| Setup difficulty | Medium to high | Easy |
| Full server control | Yes | No |
| Maintenance required | Yes | Minimal |
| SSL and reverse proxy setup | Manual | Usually included |
| Updates and patching | Manual | Usually handled for you |
| Best for advanced customization | Yes | Limited |
| Best for quick launch | No | Yes |
| Best for technical users | Yes | Yes |
| Best for non-technical users | No | Yes |
Which one should you choose?
Choose self-hosted n8n if:
- you want maximum control
- you are comfortable managing a VPS
- you want to customize your environment
- you want to keep long-term infrastructure costs low
- you are building advanced or private workflows
Choose managed n8n hosting if:
- you want to launch faster
- you do not want to manage Docker, Nginx, or backups
- you want less maintenance work
- you prefer convenience over full control
- you want a simpler experience for production use
Final Thoughts
Self-hosting n8n on a VPS with Docker Compose is one of the best ways to get full control over your automation platform without making the setup overly complicated.
With the right VPS, a proper domain, Docker Compose, Nginx, SSL, and regular backups, you can build a reliable n8n environment for personal use, business automation, client projects, webhook handling, and AI workflows.
For testing and small projects, a lightweight VPS can be enough. For business and production use, a stronger server with PostgreSQL, backups, and better monitoring is the smarter choice.
If you want flexibility, privacy, and long-term control, self-hosting n8n is an excellent option. If you want speed and convenience, managed hosting may be the better fit.
The most important thing is to choose the setup that matches your workflow, your time, and your technical comfort level.
FAQ
Can I run n8n on a 2 GB RAM VPS?
Yes, a 2 GB RAM VPS can run n8n for light usage, testing, or personal workflows. For production use or more complex workflows, 4 GB RAM or more is recommended.
Do I need Docker to self-host n8n?
No, Docker is not the only way to run n8n, but it is one of the easiest and cleanest methods. Docker Compose makes setup, updates, and container management much easier.
Is SQLite okay for production?
SQLite can work for testing or very small workloads, but PostgreSQL is a much better option for production use, larger execution history, and more reliable long-term performance.
Do I need a domain name?
You can access n8n using a server IP during testing, but for production use, a domain or subdomain is strongly recommended. It is also required for clean SSL setup and reliable webhook handling.
Can I use HTTPS with self-hosted n8n?
Yes. A common production setup uses Nginx as a reverse proxy and Certbot to install a free SSL certificate.
In most cases, no. n8n is better suited for VPS, cloud servers, containers, or dedicated hosting environments where you can control the runtime and server configuration.
How do I update n8n safely?
The safest method is to back up your files and database first, pull the new Docker image, restart the containers, and check logs after the update. On production setups, pinning a specific n8n version is recommended.
Is self-hosted n8n secure?
It can be very secure if configured correctly. Use SSL, strong passwords, proper firewall rules, regular updates, backups, and a production-ready reverse proxy setup.
What is the best database for n8n?
PostgreSQL is the best choice for most production environments. SQLite is useful for testing and small personal setups.
What if I do not want to manage a server?
If you do not want to manage Docker, backups, SSL, or updates, managed n8n hosting is usually the better option.